Waltzing Matilda with a swag, Part 4 – Cooking & Food Preparation

Making your tucker on the wallaby is an exercise in minimalist food preparation and cooking. Sure, you can take modern pre-prepared or freeze dried foods with you instead of the stuff the old-timers carried, but between you and me… that’s cheating. Taking a gas cooker or even an alcohol stove is cheating too. If the bushfire fire danger allows it, you use an open fire for your cooking. If it doesn’t then stay home or “cheat” and use a Jetboil and freeze dried slop-in-a-bag.

You’ll find that the “minimalist” concept I’m talking about relates mostly to your cooking equipment. There’s no cast ironware, enamel boilers or fold up grills here. Since you’re carrying it all in your nosebag, you want your cooking equipment to be as light as possible while still being effective.

The cooking gear described in this post is more of a Queensland style used by swagmen travelling that great state. It’s traditional, but there are many other options for preparing your tucker as the swaggies did. You can read more on this in my soon-to-be-released book On the Wallaby Track: A Swagman’s Handbook.

Something to boil water in

For the purposes of this post, we’re boiling in a quartpot. Traditionally, a quartpot was a small billycan with a pannikin (cup) stuck inside. Made from tinplated sheet metal or from copper, the quartpot was a very common piece of equipment for the bushman, whether he was a swaggie, drover or prospector. The quartpot even pre-dates the billycan by about 40 years. You can see references to them in books and newspaper articles circa 1810s since an earlier, but very similar design were issued to convicts as a type of mess tin. They are still in use by stockmen today, as well as by some of us who like to bushwalk and camp in the old style since they are twice as useful as a billycan.

20160323_152923

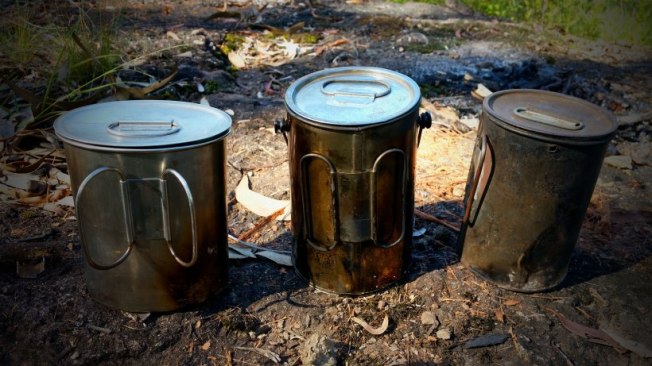
Some of my quartpots – from left – Stainless steel oval section quartpot and pannikin made by Ord River, John Williams Beltana pattern round pot and pannikin, vintage station-made round pot and pannikin – made from kerosene tin sheet metal and fencing wire.

My own quartpot and pannikin were sold by RM Williams and were made by RM Williams’ son, John. They seem to have gone out of production sometime in the last 12 months, but hopefully they’ll be back. The type of quartpot and pannikin I use are a round type. You can find quartpots with a “D” profile or oval or rounded rectangular profiles. These are stockman’s patterns designed so they don’t stick out too far when strapped to the side of the saddle.

In use, a quartpot has to be filled to the brim to stop the solder from being burnt out. It is pushed into the side of the fire, downwind of any prevailing breeze so that the flames lap around the whole pot, making it boil quicker. The oval profile quartpots excel here since the surface area is greater they tend to boil quicker.

If water is at a premium, you can boil water in the pannikin itself. As with the quartpot, you need to make sure the pannikin is filled to the brim or you’ll ruin it.

You wouldn’t try to make a stew in a quartpot, but it’s quite OK to use it to brew up tea or coffee. A burnt-on stew is a bit harder to clean up than coffee grounds or used tea leaves.

Something to fry on

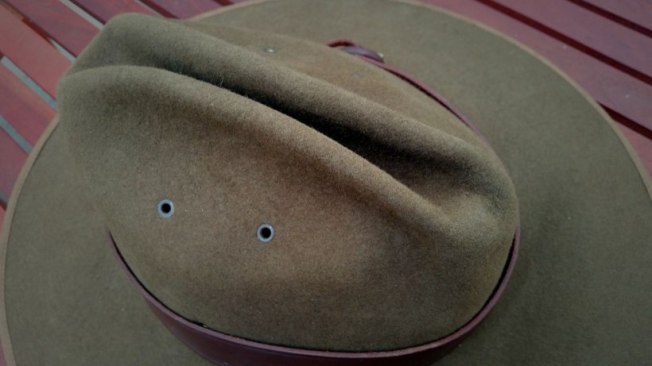
Frying an egg is a challenge unless you have some sort of hotplate or frypan. You don’t want to carry a frypan but since you have a tin plate, it can be heated up on the fire and will become a… hotplate.

I usually drill a couple of holes near the edge of my plate when I want to take it off the fire, I’ll simply hook it with a piece of bent wire and drag it out.

Eggs aren’t the only thing fried on a hot plate. Johnnycakes and even corncakes come up beautifully when  fried. As does bacon or slices of corned beef. To flip your tucker while you’re frying it you need some utensils. I have made simple tongs out of fencing wire and a lightweight, but effective spatula out of a flattened corned beef tin and a length of deadfall timber secured to it with wire.

Something to grill on

You can of course make your own campfire grill out of some bendy green sticks, but if you do, you’re a vandal. You see, they only last for one use so you’ll have to make up a new one every time you want to grill a bit of meat or apple as you as go along, killing a bunch of saplings or stripping live branches in the process. Nope, in today’s environment you need to make up one which lasts, and which you can rely on even if there’s not a green stick to be found.

The traditional swagman’s solution was a bit of fencing wire bent up into the shape of the swagman’s hand. When not in use it was folded up and slid down inside the nosebag. It weighs very little and is highly effective. I’ve cooked bacon on one, grilled sausages, bits of steak, slices of apple and have toasted up pre-cooked johnnycakes on one.

Something to make damper in

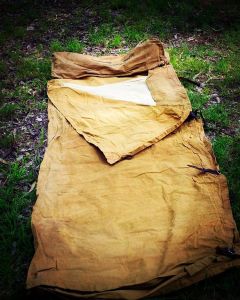
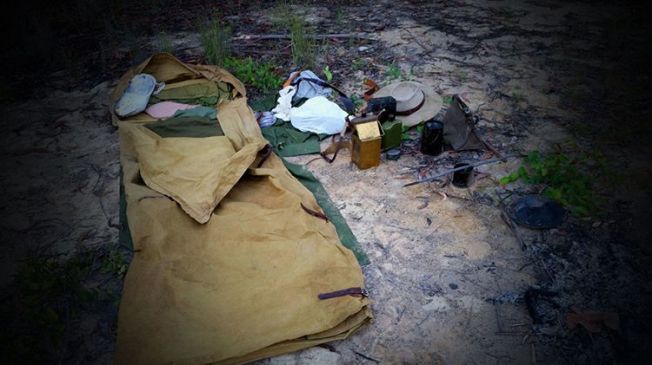
You don’t really want to carry around a big mixing bowl and unless you have tons of water available, mixing damper in your quartpot or billy will lead to a huge mess. The swaggies mixed their damper on a bit of cloth laid over a depression they kicked into the dirt.

The well-equipped swagman used a square of canvas brought along specially for the purpose, but everyone else used the back of their coat or even the underside of their canvas swag cover. Some even used a wool blanket. If you first put down a lot of flour you don’t get much dough sticking to the mixing sheet. When it’s dry it can be blown or scratched off anyway.

I tend to use a square of calico myself.

Cooking Damper and Johnnycakes

Damper is best cooked directly on the coals or in the ashes of the fire. You’ll find that the ash and coals don’t stick and can be brushed off easily. With the sand method described below, the sand brushes off easily too.  Cooking them this way is nowhere near as bad as it sounds. The secret is to coat the uncooked dough with a layer of dry flour.

dsc_0067

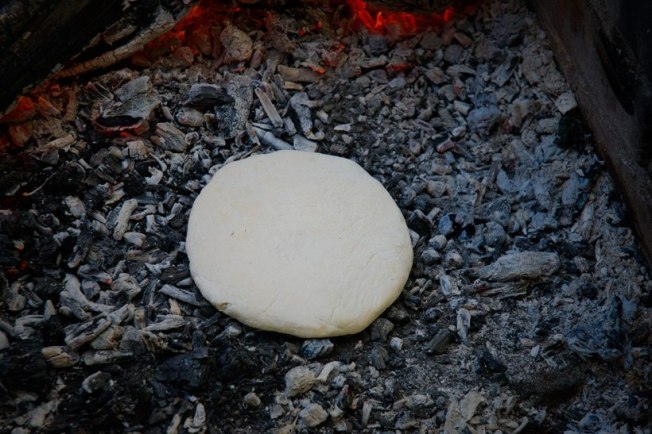
Johnnycake cooking directly on the coals.

For the best damper, it’s actually best to cook it in hot sand. Make a depression in the sand and light a fire which burns down to a nice hot bed of coals. Brush aside the coals and lay the damper on the hot sand underneath. Brush the coals back over the damper and then bury the whole lot in sand. Mark your damper with a stick so you don’t lose it.

After the damper has cooked you need to completely cool down the hot sand with copius amounts of water before you move on.  If any person, stock or native animals walk over the hot oven they can be seriously injured. Don’t leave it until you’d happily walk on the dug up damper hole with bare feet.

How do you know when your damper is done? You stick in a twig or your knife blade. If it comes out clean then the damper is cooked. If it has dough on it, then leave the damper in for another half an hour.

Johnnycakes can be cooked in exactly the same way as dampers, but I find I prefer to cook them on the tin plate over a medium-hot fire. You can cook a bunch of them at a time and the process is just more controllable.

Something to cut on and with

To cut up cheese or corned beef or pork belly or vegetables, I just tend to use the tin plate. You can carry a plank of wood around as a chopping board or you can carve one from a bit of deadfall timber on site. The best improvised cutting board I have found is a coolamon made from a sheet of bark from an old flood-felled sheoak (casuarina) tree. Works great

The most important cooking utensil is a knife. I carry a sharpened vintage butter knife which sees more use as a food chopper and slicer utensil than anything else.

I haven’t covered any food hygiene here. More on that in a later post.


Waltzing Matilda with a swag, Part 3 – Sleeping

This post is about the bedding used when swaggin’ it. You’ll notice there are no self-inflating mattresses or camp cots used. Spending a few nights out bush without them is no great hardship, and they are easy to improvise.  We’ll start from the ground up when describing the sleeping gear.

The cold, hard ground

If you’re sleeping on the ground without a pallaisse (described later) then that cold, hard ground is going to put pressure on your hip bones, making for an uncomfortable sleep. The classic solution to this problem is to dig yourself a hip hole. This is not actually a hole, but more of a short and shallow trench kicked out of the soil with the heel of your boot. It allows you to roll over in your sleep without having to precisely place your other hip bone into the same hole. Make this hip hole just a little longer than your waist is wide and make the hole about 5-8cm deep. It’s easy to fill in the next morning.

If you’re sleeping on sand on a beach or by the side of a sandy creek, or even in sand dune country, you’ll find it can be soft and comfortable, with no undue hip pressure, but it will sap the heat right out of you. You’ll need insulation.

Insulation and comfort

Traditionally, the bushman’s bed was a pile of soft, bushy boughs cut from the nearby vegetation. They served to break contact with the heat-sapping effects of the ground, while providing a soft and comfortable surface to lay upon. Today, we don’t go around vandalising the place by destroying ti-tree and tree ferns just so we can sleep soundly upon their remains. Instead we use other means to make a bushman’s bed.

A pallaisse is a calico or canvas bag which is carried empty and in camp is filled with dry leaf litter, sheoak needles, grass or leaves stripped from fallen timber. when compressed by the body weight of the sleeping person, it not only provides comfort levels approaching those of a feather mattress, but it insulates as well. In my experience, a palliasse is the most warm and comfortable bed you’ll ever find out bush.

1035796104982556082_1392718578

Here you can see a cotton sleeping bag liner stuffed with sheoak needles being used as a pallaisse bag  mattress during a recent bushwalking trip.

If you’re willing to use nylon equipment, you’ll find that those useless Australian army issue blow up mattresses have a place here. Ditch the PVC blow up cells and keep the nylon outer cover. Fill each of the three channels inside the cover with sheoak needles, dry grass or leaves and you have the perfect pallaisse bag and it stops the filling from moving around during the night. Since I don’t do nylon, I’ll have to make do with a clone of this mattress cover sewn together from cheap cotton calico. Another ready-made option for a pallaisse bag is a cotton sleeping bag liner. Add some ties so you can close it up completely. Filled completely with leaf litter or dry grass it’s a fantastically comfortable mattress.

If using a pallaise bag, then make sure that you return the filling to the bush and spread it out. Minimal impact is the right mindset.

If you’re travelling lightweight, you can use layers of newspaper between your groundsheet and  your bedding. I have used this method many times and I find that it insulates exceptionally well. I have to say I was quite surprised the first time I tried it. Soft sand insulated by one or two layers of newspaper is perhaps the perfect bed. 4 or 6 broadsheet pages are all that’s needed. The newspaper weighs almost nothing. Has almost zero bulk to it when rolled up in your swag, and it has multiple uses besides. Foul weather fire lighting aid for instance, toilet paper as another.

Swag cover

1138919903449313132_1392718578

My vintage swag cover. This is made from linen canvas and dates to 1940. It’s an envelope type with leather straps and nickeled brass buckles to secure the sides. It is an Australian Army officer’s bedroll made by Evan Evans Pty Ltd in Melbourne.

Proper, made-up swag covers like those “traditional” envelope swags we see today have only been in common use in Australia since the 1930s. That’s not to say they are no good – I use one myself for most trips. Before they came along the swag cover was a strip of canvas or oilskin longer than the user was tall, and wide enough that it could be brought over the top of the sleeper’s bedding and even tucked underneath a bit. It provided a windproof layer and a little protection from dew or light precipitation.

There was an art to putting together a canvas sheet swag, and it was the most commonly used form of swag cover there was.

Blanketry and pillows

1228198830268738764_13927185781

A rather untidy swag camp at the Bulldog Gold Diggings in Far Northern NSW. Here you can see a green lightweight wool army “horse” blanket inside the swag and a calico bag packed with spare clothes for use as a pillow.

Inside the swag cover was the bedding. Traditionally the bedding was one of more woolen blankets, being light grey or blue by choice. This is the reason for the swag roll being named the “Bluey”. An army surplus blanket is a good choice here since it’s usually 100% wool, is the right colour (grey wool) and is generally long and wide enough to double over the sleeper. In cooler weather obviously two blankets are better than one, and the use of two allows you to make a warm and roomy sleeping bag by carefully folding the two blankets together.

If using one blanket, you can still make a more snug-fitting sleeping bag by using five or six blanket pins to secure the side and bottom of the folded over blanket. A sleeping bag format is more effective than just an open blanket because there’s less opportunity for that cushion of warm air inside the bedding to escape.

Pillows are something that aren’t completely necessary, but are nice to have. If you don’t have a bag for use as a pillow then you’re forced to improvise. Incidentally I will often tie my hobnailed leather boots together with the foot openings facing up, then I’ll place my slouch hat over the openings and lay my head upon the hat. It makes a wonderful pillow. Since most times I have a spare calico bag floating around in the nosebag, I’ll often fill it with my shirt and pullover, which also makes a fine pillow.

Sleeping Bags

013

My 1960s-vintage Paddymade superdown-filled “Kiandra” sleeping bag. Great for use with a swag.

Having humped the drum through cold and sleet, and even camped in the snow with my swag, I can tell you that sometimes a sleeping bag is useful during the extremely cold weather. In the snow in minus 10 degrees (C) weather, a wool blanket just won’t cut it. I use a couple of different sleeping bags.

The warmest is a 1940s vintage US army arctic sleeping bag outer. This is a feather and down-filled cotton rectangular sleeping bag which can be opened out into a quilt. It’s vintage, although not a traditional swagman’s kit, but it works extremely well.

The other is a classic Australian bushwalker’s Paddy Pallin Paddymade “Kiandra” japara-covered, superdown filled sleeping bag. Bags similar to these were available from the 1930s and were used by swag-toting bushwalkers.

Waltzing Matilda with a swag, Part 2 – Shelter

With all of these new-fangled modern canvas swags you see with their hooped poles and pegged-down corners, you could be forgiven for thinking that the swag was always meant as the sole source of shelter for the swaggie or the stockman. Nothing could be further from the truth. A canvas bedroll or swag cover was only ever used for bedding. If wet weather was expected the swagman built or used a shelter, whether it be a hastily thrown-together grass or bark gunyah, a lean-to of leafy branches set against a fallen log, an actual tent, or just a humble shelter sheet or tarp. Laying out in the rain under a canvas swag is folly. It’d get soaked and would weigh a ton when you have to carry it the next day.

Aside from overhead cover, you’d need some sort of ground cloth. If you have the room, an oilcloth jacket or a rain cape aren’t a bad idea either. In the case of a WWI/WWII-era army rain cape, it was designed to double as a groundsheet, thus killing two birds with one stone. In wet weather, you still have to walk, so the groundsheet does triple duty as a waterproof wrap for your swag roll.

Tarp

1327490916952432706_1392718578

Japara tarp pitched lean-to style as a bit of a windbreak during a recent swag walk

Historically, in many cases, the tarp WAS the swag cover. For more info on the swag cover itself, see the next in this series of posts. The most traditional of tarps is a cotton one, treated to shed rain, and preferably made of a closely-woven cotton like japara.

My own tarp of choice is a cotton japara tarp from Terra Rosa Gear in Victoria. It’s 3m long x 2.3m wide and can be pitched in any number of configurations. For most conditions I’ll pitch it in an “abdulled” configuration, with the windward side pitched to the ground and the other held up by deadfall sticks. This gives plenty of living room. In foul weather I’ll pitch it hootchie-style like an “A” tent.

Groundsheet

1367704717572323332_1392718578

Groundsheet wrapped around the swag roll as a rain cover.

A groundsheet has to be waterproof so that if it starts to rain really heavily, any runoff can run under the groundsheet rather than into your bedding. I use a WWII jungle groundsheet most often. It is a coated japara fabric which is relatively lightweight but is as waterproof as nylon. I lay it on the ground first, then the rest of the bedding goes on top.

If the weather is dodgy I’ll wrap my swag up with the groundsheet as well. You probably won’t find one of these jungle groundsheets, but a strip of light oilskin is the next best thing. You could of course use a nylon poncho or similar, but when I’m swaggin’ it, I pretend that such high-tech fabrics as  nylon haven’t yet been invented.

Rain Protection

A wet weather garment is essential if you’re swaggin’ it through wind and rain. I use a 3/4 length oilskin coat with the cotton lining removed to reduce weight and bulk. Mine is a Burke and Wills brand coat.

rain_cape

What Price Glory’s repro British rain cape groundsheet.

An ex-army combination rain cape and ground sheet is a great idea, since it means less weight to carry but originals can be difficult to find in a useable condition. In this case you can find a reproduction one from What Price Glory in the USA.

You’ll notice that neither of these options has a hood. That’s because the best head protection can be had from a wide-brimmed hat, preferably one made of felt.

20161025_161319

Nothing beats a good, old fashioned felt hat for rain and sun protection, particularly if used with a chinstrap to stop the wind from blowing the hat off your head, and to help angle the hat against wind or rain.